Alcatraz Cell Update

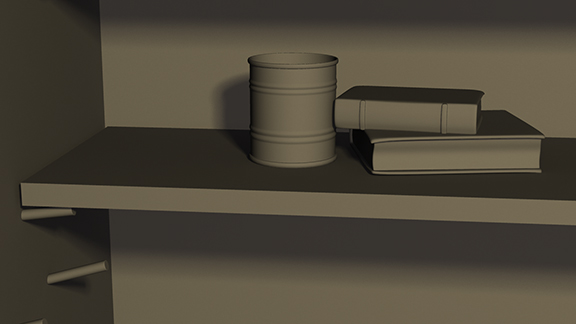
Well I wanted to give an update on my environment project of an Alcatraz prison cell.  The modeling phase of my project is 99% complete.  I am currently working on UVs and texturing my project.  I am incorporating Zbrush into my workflow as well.  With Zbrush I am able to add more details and create my Normal Maps out of their on certain objects. This is a great way of adding detail without adding to the polygon count on an object.  So far I just threw on a couple base textures.  The pillow is one example where I used Zbrush to add some more wrinkles.  I plan on really hammering down the next week or so to get a lot more done.  Here are a couple images of my progress:Cell WIP and with BarsPillow Detail

BELZ

Posted in CG Work | Leave a comment

A Couple Props

For my Cape May house I created a few props in which I mentioned in my last post.  I have been learning a few new texturing techniques that I am trying to utilize.  Using a remapping technique with a ramp connected to it I am able to use my diffuse texture to pull out my bump.  I am also able to use a ramp with the diffuse weight and adjust the tones and contrast of my texture.  This is great because it gives you more control over your texture and you can easily make adjustments.  Here are a couple ambient occlusion passes with the final images of some of my props:

Wooden_Toolbox_Render_Occ_001Wooden_ToolboxLadder_Render_Occ_002Ladder_001BELZ

Posted in CG Work | Leave a comment

Back to Personal Projects

It’s been way too long since my last post and I plan on updating my blog more frequently from here on out.  But, since my last post, I am still working on my Victorian House environment model. I have made some progress on the environment and some props, but have since turned my attention to another environment model that I would be able to get done in a shorter amount of time.  The environment I chose to is an Alcatraz jail cell.  I chose the cell because it’s not overly heavy of a scene, but it is something I feel I could do a lot with as far as textures go.  I definitely plant on making it have that old, abandoned feel, by making it dirty and dingy.  I have just about all of the modeling completed.  There are just a few things to fix up with the trays on the wall, the bed, and a couple of props.  Here are a couple images of my progress thus far:

Toilet_Sink CanBooks

Alcatraz_Cell_001


BELZ

Posted in CG Work, Thoughts / Updates | Leave a comment

Cape May House CG Model

Well it’s been a while since giving an update.  In my last post I mentioned that I began working as a Lab Specialist/Studio Artist at Full Sail University.  I’m not the biggest fan of the Orlando area but that is where I am at for now.  I am going into my 6th month at Full Sail.  Time is really flying by and the classes can be hectic at times just like when I was a student there.  I don’t always have as much time to work on my own projects as I would like but I am trying to when I can.  It is nice having the access to fellow employees and pick their brains on different aspects of CG/3D.  The learning never stops!!!

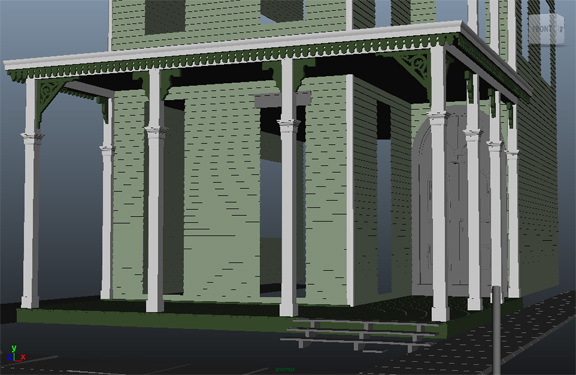
Before I talked about the environment I had started and just want to show off some of my progress so far.  I haven’t been able to get as much done as I would like but it’s coming along.  The section I have been working on the most is the porch area including the main door and accent pieces.  I am trying to model the house as it would be built which I think will add to the realism of the model.  Here are some screen grabs with and without wireframes.  Feel free to give me any feedback as always!


BELZ

Posted in CG Work | Leave a comment

Update and New Projects

Well a lot has changed since my last post!  I ended up getting a job at Full Sail University, which is the school I received my BS in Computer Animation from, in Winter Park, FL.  I am working as a Lab Specialist for a class called 3D Foundations or 3DF for short.  It is the first class our students have working with Maya.  So far it is going good and I am enjoying being back around people who love CG and 3D Arts.  It has re-motivated to learn my craft and create new art pieces.

Working and living in Florida this time around definitely has been a different experience than compared to when I was a student at Full Sail.  As a student the curriculum is very demanding than what it might be at your typical University.  So this time around when I am not working I can take the time to enjoy myself and surrounding a bit more.

Since being back I decided to start working on an environment model that I had been wanting to do.  It is of a Victorian style home that is located in Cape May, NJ.  This area has a lot of old homes with unique styles about them.  Below is a picture of the house I will be working on.  I may do the surrounding houses as well since they are similar in design with slight modifications.  Also below is a screen grab of my blockout for the environment.  The hardest part of working on an environment is getting your camera setup with your image in the proper location and focal lenghth.  I am further along then the blockout stage but I will post those images later on when I have slightly more done.


BELZ

Posted in CG Work, Thoughts / Updates | Leave a comment

Catching up!!!

Well I decided to give an update since I haven’t had the chance to post in a bit.  About 4 months ago I started working locally in South Jersey so I would be able to make my payments on my school loans.  You hear about how tough it is for college graduates these days and I am no different.  The job I found through a family member is at a local shirt shop, called the North Wildwood Shirt Shop, as a graphic artist.  Definitely not the career I want but at least it is art related.  It is something I once did so it was a pretty easy transition.  Mainly it is a lot of Illustrator and Photoshop computer work.  I create designs for store products and wholesale orders of T-shirts and other type of garments.  In the mean time while working I am still applying to jobs hoping to get something that is in the CG/Computer Animation industry.

One thing I did work on recently was going back to a compositing project that I had back at Full Sail University.  It is a compositing clip of a car animation.  Mainly I did this was to get a better understanding of some techniques to enhance some of my future projects.  One thing in particular was the use of the z-depth pass.  It is something that definitely gives cg more realism.  I will post the video.  You can find that video on my website at www.brianbelz.com under the cgwork link.

Here I will post an example of a project from my job and some photos that I got a chance to take about a month ago.  The project from my job was for my old high school.  It was for the girls basketball team.  I came up with about 12 different designs but this is just a few of them.  The photos are from Cape May, NJ at the Cape May State Park.  It was definitely a nice fall day.  I hope you all enjoy.

BELZ

Posted in Photography, Thoughts / Updates | Leave a comment

Crate Texture

Following the tutorials I mentioned in my last post I textured the crate.  The UVs were laid out in 3DS Max.  I then used the UV layout to add textures in Photoshop.  For the texturing I didn’t follow the tutorials.  I did that on my own using a combination of photos and other Photoshop brush techniques.  This is similar to how it was done in the tutorials.  For the final render I decided to just import the object into one of my previous scenes in Maya.  I figured that would be quicker at the moment than learning the render settings in 3DS Max.  I do plan on going in and learning how that will work as well.  For the time being here are a few images.  I am including the final render, diffuse map, and an image of my UVs in 3DS Max.  For the final render I also used a normal map and specular map.

BELZ

Posted in CG Work | Leave a comment

Adapting to 3DS Max

Recently I have been taking some time adapting what I know from Maya into 3DS Max.  I feel 3DS Max is another program I should know in helping me to find a job in the CG Industry.  So far I feel the learning curve from one program to another isn’t that bad.  It is just a matter of terminology and learning different toolsets.  I have used what I know Maya and also looked around online for tutorials that may be helpful in learning 3DS Max.

One set of beginner tutorials that I have found helpful is by 3DHelpBay.  The tutorials takes you through making a low poly crate/shipping box from modeling, to UVs, and texturing.  I found these tutorials helped me by learning the interface and seeing how tools are used.  You learn how to make the object and editable polygon, insert edges, do extrudes, etc…  Everything in the videos are very well explained and easy to follow.  I am attaching a screenshot of the modeling portion of the tutorial that I did.  I am going to create my own textures for the crate.  I plan on using Vray for the rendering to gain some knowledge with that.  As soon as I finish that up I will post the final image.  In the meantime here is the screenshot I mentioned earlier.

BELZ

Posted in CG Work | Leave a comment

Golf Texture

I decided  to post my texture map for my Golf scene.  This is my diffuse map that I used for all of the objects besides the grass.  In combination with the diffuse map, I made various specular maps and bump maps depending on what the materials in the scene were.  As for the grass I made a repeatable texture map.  I did that so I could scale it according to how I felt the proper size of the grass should be.  But here is my diffuse map for the Golf scene excluding the grass.
BELZ

Posted in CG Work | Leave a comment

Golf Inspired

With the US Open being on a week or so ago I was inspired to do a quick golf image.  I did the model in Maya, rendered with Mental Ray, and some finishing work in Photoshop.  I had to use a plugin called dnPolyhedron-v1.1-.mel (for MAC) when getting the starting shape for the golf ball.  This plugin is a simple UI for creating polyhedrons from one of four base platonic solids: tetrahedron, octahedron, dodecahedron,and icosahedron.  Now you can get a platonic solid from Maya but the shape isn’t created even and your golf ball will come out lumpy.  That is where the plugin comes in.  It gives you that nice even starting shape which is the icosahedron for the golf ball.  Enough of the technical stuff!  I am posting 3 images.  One of the model not textured, a wireframe image, and the final image textured and tweaked in Photoshop.


BELZ

Posted in CG Work | Leave a comment